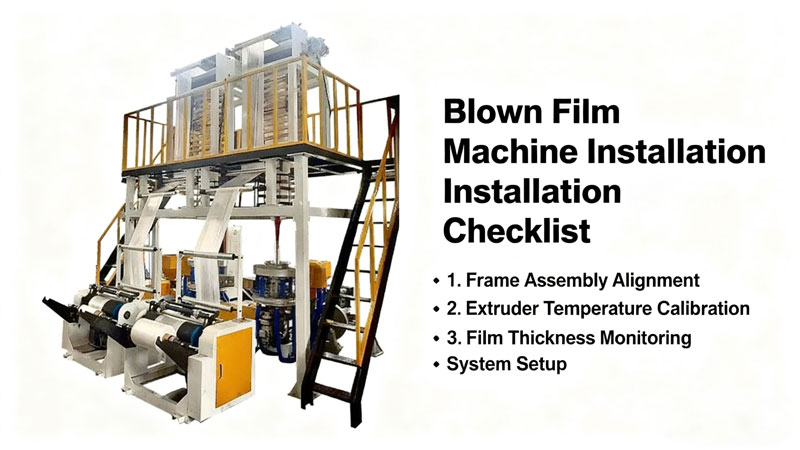
A blown film machine is a significant investment, and its proper installation is critical for achieving optimal performance, product quality, and long-term reliability. A haphazard setup can lead to production issues, material waste, and increased downtime. This practical checklist serves as a foundational guide for technicians and project managers to ensure a systematic and safe installation process.
Phase 1: Pre-Installation Foundations & Site Preparation
Before the machine arrives, the site must be ready. This phase prevents costly delays and rework.
Floor Plan & Space Audit:
Verify the factory layout against the machine manufacturer's floor plan drawings.
Confirm clearances for operation, material loading, and maintenance access. Remember to account for space for downstream equipment like nip rollers and winders.
Ensure the floor is level, robust, and can support the full weight of the machine, including raw material (resin) loads.
Utility Connection Points:
Power Supply: Confirm the voltage (e.g., 380V, 480V), phase, and frequency requirements. Ensure a dedicated, stabilized power source with the correct amperage is installed by a qualified electrician.
Compressed Air: Verify the required pressure (PSI/Bar) and volume (CFM). Install an air line with a filter and dryer to ensure clean, moisture-free air for bubble cooling and pneumatic controls.
Water Cooling System: For machines with water-cooling rings, plan the plumbing for inlet and outlet lines. Determine if a closed-loop chiller system is needed to maintain consistent water temperature.
Ventilation & Fume Extraction: Install adequate ventilation or exhaust systems to remove heat and any potential volatile organic compounds (VOCs) from the decomposition of plastic.
Material Handling & Environment:
Designate a dry, clean area for raw material (plastic resin) storage. Moisture can ruin the film quality.
Plan the path for moving raw material pallets to the machine hopper.
Maintain a stable ambient temperature in the production area, as extreme temperatures can affect machine calibration and film properties.
Phase 2: Core Mechanical & Electrical Setup
This is the hands-on phase of assembling the machine itself.
Uncrating & Component Inventory:
Carefully uncrate all components and visually inspect for any shipping damage.
Cross-reference all parts with the packing list and equipment manual. Report any discrepancies or damage immediately.
Tool & Equipment Readiness:
Mechanical Tools: A comprehensive set of wrenches (metric/imperial), socket sets, Allen keys, torque wrenches, screwdrivers, levels, and a hoist or forklift for heavy parts.
Electrical Tools: Multimeter, wire strippers, crimping tools, and appropriate labeling equipment.
Measurement Instruments: Laser thermometer (for monitoring die and barrel temperatures), tape measure, and calipers.
Assembly Sequence:
Base Frame & Extruder: Assemble and level the main frame. Mount the extruder barrel and screw assembly according to the manual, ensuring all connections are secure.
Die Head & Air Ring: Install the die head with extreme care, ensuring it is clean and perfectly leveled. A misaligned die will produce uneven film. Mount the cooling air ring concentrically around the die.
Nip Rolls & Haul-Off Unit: Erect the tower and install the nip rolls, ensuring they are parallel and calibrated to the correct pressure.
Winders: Install the surface or center winders, ensuring they are aligned with the web path.
Phase 3: Electrical, Control, and Safety Integration
Precision here ensures the machine runs smoothly and safely.
Power & Control Wiring:
A licensed electrician should handle all high-voltage connections to the main drive, heaters, and control cabinet.
Methodically connect all sensors, thermocouples, and motor feedback devices. Neatly bundle and label all wires to facilitate future troubleshooting.
Control System Configuration:
Power up the control system and input initial parameters as specified in the manual (e.g., heater zones, motor speed limits, temperature profiles).
Do not start heating until verifying that all cooling fans and systems are operational.
Safety System Verification:
Test every emergency stop button from all stations.
Verify the operation of all safety interlocks on guards and access panels.
Ensure all rotating parts are properly guarded before initiating any test run.
Phase 4: Pre-Startup & Commissioning
The final checks before producing the first meter of film.
Gearbox & Lubrication: Confirm the gearbox is filled with the correct type and grade of oil to the specified level.
Heating & Cooling Dry Run:
Start the cooling systems (air and water).
Gradually heat the extruder and die to the processing temperature for the specific polymer (e.g., LDPE, HDPE, LLDPE). Soak at this temperature for the recommended time to ensure thermal stability.
First Bubble Formation:
With the extruder at the correct temperature, start the screw at a very low speed.
Manually guide the extruded polymer through the nip rolls to form the initial bubble.
Inflate the bubble slowly with air, adjusting the air ring flow to stabilize the bubble shape and frost line height.
Final Consideration: Operator Training
The installation is not complete until the operators are trained. Ensure the machine supplier provides comprehensive hands-on training on startup, shutdown, daily operation, and basic troubleshooting for the specific material grades you will be using. This step is crucial for preventing operator-induced errors and maximizing productivity.
By methodically following this structured checklist, you can significantly reduce installation risks, accelerate the time to stable production, and lay the groundwork for a highly efficient blown film operation.